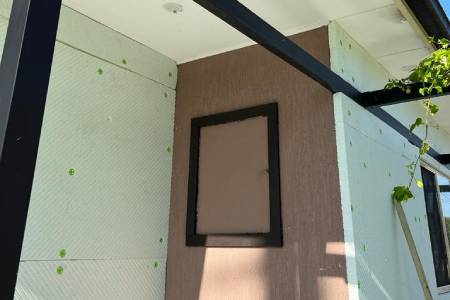
Polystyrene rendering is quickly becoming a popular choice for homeowners and builders seeking energy-efficient, durable, and visually appealing wall finishes. Known for its excellent insulation properties and ease of installation, this technique is particularly suitable for both residential and commercial projects. If you’re considering this modern wall treatment, the experts at DCR Cement Rendering are here to guide you through the process. In this article, we'll walk you through a step-by-step guide to applying polystyrene rendering on walls.
What Is Polystyrene Rendering?
Before diving into the how-to, it’s essential to understand what polystyrene rendering involves. This system uses expanded polystyrene (EPS) panels as a base for external wall rendering. These panels provide superior thermal insulation and are lightweight, which makes installation quick and efficient. Once installed, the panels are coated with a reinforced render system to provide a smooth or textured finish, depending on your aesthetic preference.
Step 1: Preparing the Surface
Proper preparation is the foundation of a successful rendering job.
- Clean the wall surface: Ensure that the substrate (typically brick or blockwork) is clean, dry, and free from dust or debris.
- Apply a bonding agent: A primer or bonding agent may be needed, especially if the surface is non-porous or very smooth.
- Mark out levels and fix battens: Use a level to mark straight lines for EPS board alignment. Fix temporary battens if necessary to hold the first row of boards in place.
Step 2: Installing the Polystyrene Panels
- Measure and cut EPS panels to fit the dimensions of your wall. Use a fine-toothed saw or hot wire cutter for accuracy.
- Apply adhesive: Spread a suitable polystyrene adhesive to the back of each panel using a notched trowel.
- Fix the panels to the wall, pressing firmly to ensure full contact. Stagger the joints between rows for better structural integrity.
- Secure with mechanical fixings: Once the adhesive has cured (usually 24 hours), add plastic insulation anchors for extra stability.
At DCR Cement Rendering, our professionals recommend spacing mechanical fixings evenly and placing them at corners for reinforced support.
Step 3: Apply the Base Coat and Mesh
- Mix your base coat render according to the manufacturer’s instructions.
- Apply the first coat (around 4–6mm thick) using a stainless-steel trowel. Work in manageable sections.
- Embed alkali-resistant fibreglass mesh into the wet base coat. Overlap mesh edges by at least 100mm to prevent cracks.
- Smooth out the render and allow it to dry completely—typically 24 to 48 hours depending on weather conditions.
The mesh layer plays a vital role in reinforcing the render and preventing cracking, a crucial step in the polystyrene rendering system that DCR Cement Rendering never skips.
Step 4: Apply the Finishing Coat
- Choose your finish: You can opt for a smooth acrylic finish, a textured look, or even a painted surface, depending on the desired effect.
- Apply the finishing render using a trowel, sponge, or roller. Acrylic renders are particularly popular for their flexibility and water resistance.
- Cure properly: Allow the top coat to cure as per the product instructions. Avoid exposure to extreme weather during this stage.
Step 5: Final Touches
- Inspect your work for any imperfections or missed spots.
- Seal edges and joints using appropriate caulking or sealants to ensure water doesn’t penetrate behind the render.
- Clean up the site, removing any excess material or equipment.
Why Choose DCR Cement Rendering?
At DCR Cement Rendering, we specialise in professional polystyrene rendering systems that enhance the appearance, energy efficiency, and durability of your walls. Our team uses only top-quality materials and follows industry-leading installation practices to ensure long-lasting results. Whether you're upgrading an existing facade or building new, we offer tailored solutions to match your vision and budget.
Ready to transform your walls with polystyrene rendering? Contact DCR Cement Rendering today for a free consultation and discover how we can bring your project to life with expert craftsmanship and unmatched attention to detail.
For more information, explore our other articles focused on our bathroom rendering services.
Comments on “Step-by-Step Guide to Applying Polystyrene Rendering on Walls”